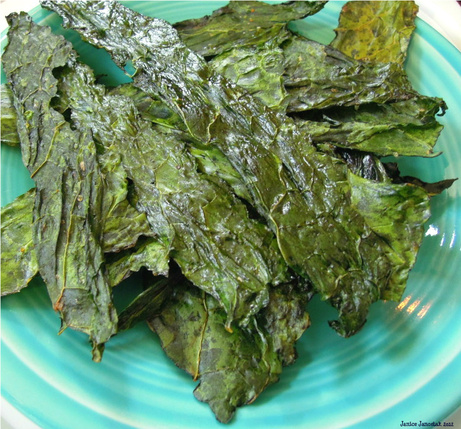
 So there I was at the co-op the other day and there they were: two bunches of lacinato kale, a couple of days old, leaves drooping like the willow does; sitting in a dim corner as a divorcee waiting for the final judgement might; ignored as elderly women at the bus stops often are, their wisdom and years of experience sought by no one. Aside from cosmetics, however, there wasn't anything really wrong with them; the stems were firm, the bunches generously sized, and there was no mush or rot whatsoever. The fact remained however that they were no longer as young and attractive as the new batch that was being put out, and therefore no longer desirable. I actually felt sorry for them, if it's possible to feel sorry for kale, of all things, and took them home with me; it didn't seem right for them not to fulfill their intended purpose. The philosophical question, "If the kale had a choice in it's own fate, would it rather have been composted and returned to the earth whence it came, than ending up in my hungry maw?" is one I'll leave for another time. Less unselfishly I also wondered, would slightly past-it's-prime kale be just as good as kale chips as a very fresh and sprightly bunch? Happily for me at least, and everyone else who snacked on them, the answer was "yes"; which means from now on I won't be so prone to shove aside yesterday's kale in a mad dash for today's pretty young things. Kale chips have been a party and snack staple in my house since I first saw Cathy Elton's recipe back in September 2010. Now they've gone mainstream (sort of ); you can find them packaged, as you would potato chips, at Fiddleheads and other "health food" grocery stores. I admit I haven't tried the store-bought version and I ought to just for comparison's sake, but I don't feel compelled to do so either because the homemade version is so good. Like potato chips, they are ridiculously addictive; but unlike potato chips, they are easy to make in an "if I can do it, you can too" sort of way. They do however require a little time and attention on your part to keep them from burning, as they crisp within minutes. Most recipes use the oven, as I prefer; but they can be just as easily done on your outdoor grill, (which I claim as my invention until your attorney tells me otherwise); or even in a dehydrator. Of the two varieties of kale that we carry regularly at the co-op, I prefer lacinato to curly kale (red, green or purple); the broad and relatively flat leaves of lacinato are much easier to work with and provide a perfect platform for the seasonings, whereas I find that curly kale tends to fall to pieces at the ruffled edges. Spicy Kale Chips 1 bunch lacinato or russian kale 2-4 T extra-virgin olive oil or good-quality vegetable oil, plus extra to coat baking sheets sea salt, finely ground, and black pepper, to taste 1/8 - 1/4 teaspoon cayenne powder, or a few drops of tabasco sauce/ hot pepper sauce to taste Preheat oven to 325 degree (F); arrange 2 oven racks in the center of the oven, but allow some air space between for proper heat distribution and circulation. Lightly coat 2-3 large baking sheets with oil (omit this step if using nonstick sheets) and set aside. If the kale has been rinsed, shake well and allow to air-dry, until it's at least dry to the touch. (A slight amount of moisture as it adds a bit of chewiness to the finished chips, which I like; but other folks I've spoken with prefer to their kale to be bone-dry at the start.) Tear the leaves in large pieces from the stems, and put in a generously-sized bowl, such as an enlarged "salad" bowl. Coat with the olive oil by turning with a spoon and/or with your hands, "massaging" individual pieces* until all are well coated. It's not necessary to be 100% coated, however; driving yourself crazy is not the goal here. Sprinkle the seasonings over the leaves and give another few turns to distribute evenly. Place the kale pieces on the baking sheets in batches; if necessary, uncurl the pieces so they lay flat on the pan. Load up your trays as long as the leaves don't overlap; place the baking sheets on the racks in the oven, and bake for approximately 7-10 minutes, checking frequently at that point. To determine doneness, push individual pieces of kale across the tray; if a piece slides easily on the tray and is stiff rather than soft or limp, it's done. If the leaves crumble to pieces at the first touch or are mostly brown in color they are overbaked; check a minute or two earlier next time. Remove individual chips from the baking sheet to a plate, bowl or airtight container as they are ready; return the rest to the oven as necessary. Continue as above with the rest of the kale in batches. You can pile the just-baked chips as high as you like; they cool so quickly that new layers don't cause the earlier ones to loose their crispness (as happens when you layer your waffles just off the iron.) Serve immediately, or store in an airtight container for at least a week - assuming they last that long. They do store successfully and retain their crispness, although when I've made them they are usually gobbled up on the spot. *Some amount of rubbing with your hands is necessary IMO to thoroughly coat the leaves, so obviously this is not the recipe for those of you who don't like to get your hands dirty. If that sort of thing does bother you, however, you might want to consider leaving the kitchen to someone else and pursue less messy hobbies, such as knitting. Or nuclear fusion. Just a thought.
0 Comments
On Saturday I had accompanied the bulgogi (see previous post) I sampled at Fiddleheads with strips of daikon radish that I seasoned and stir-fried or sauteed in the electric skillet along with the beef. I had meant to include the recipe in yesterday's write-up at this blog but forgot to include it.
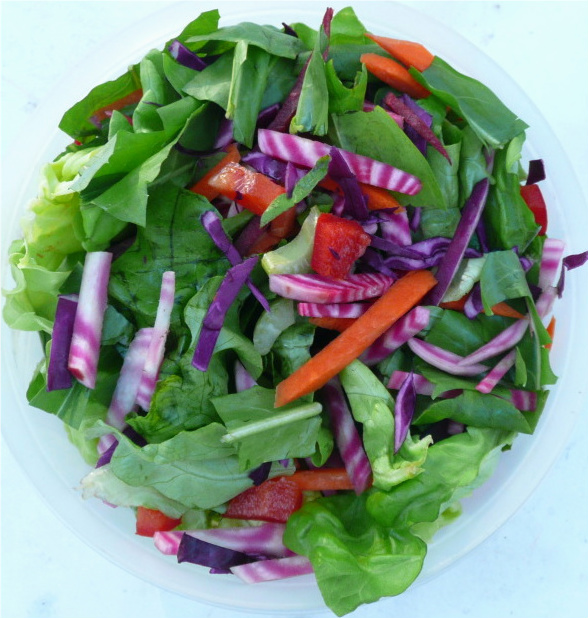
I hadn't decided on the daikon until after I'd gotten to the co-op and was heating up the electric skillet, but it seemed a natural fit with the Korean beef recipe. The marinade was something I threw together on the spot entirely from ingredients available to me right there in the bulk section: rice vinegar, sesame oil, five spice powder and curry powder. Carol Booth, our bulk spice buyer, suggested the five-spice powder; the one she purchased for the co-op is redolent of cinnamon and milder in flavor than previous versions of the seasoning I've encountered, which were robust and rather awful. The curry powder I used is the one that is simply labeled "curry powder", is a brighter yellow-orange than the other jar of "machi" curry, and has a subtler fragrance with an almost floral quality. The other powder is a dull yellow and smells like the kitchen of an Indian restaurant. I used coconut sugar from bulk because I didn't have honey or agave available; for the same reason I used kosher salt instead of soy sauce. As I was throwing things together right there at the co-op into my bowl, I was unable to measure anything and so went by taste. In other words, this is (per usual) more of a suggestion than a set-in-stone recipe - and all brickbats should therefore be slung my way. Briefly, daikon is a radish of Asian origin that is milder than the familiar red radish; it's crisp texture and mild taste are actually closer to a turnip once cooked, although it still has a mild "bite" when raw. When you go to the co-op's produce section, you'll see it near the carrots; it's a thick and elongated white "club" (at least it looks to me like you could whack someone with it in a desperate emergency, although I doubt it would inflict lasting damage.) You can use it any way you would use any other root veggie: shredded raw on salads, stir-fried (my favorite way to cook it), oven-roasted, pickled; it can even be boiled, pureed and served as you would mashed potatoes. In fact, one young customer at the co-op Saturday, barely taller than the FMRF table, said that his sample "tastes just like potato!" And as he finished it off with a grin on his face, I took that as a seal of approval. Seasoned Daikon "Fries" (Skillet Version) (with thanks to Carol Booth for her advice and assistance) 1 daikon radish, cut into strips about the size and shape of a standard french fry Marinade the strips in a combination of the following: brown rice vinegar toasted sesame oil curry powder five-spice powder salt (kosher, sea salt, or soy sauce) sugar (coconut, raw, honey or agave) Adjust seasonings to taste, pour over daikon strips, and set aside while your lightly-oiled skillet or wok is heating up. When the pan is just hot (don't let the oil smoke or burn) toss the strips in, and turn every so often with your spatula until brown on all sides and the strips are as crisp or as tender as you like. The longer the strips sit in the marinade the more quickly they cook and the more tender they become, so time accordingly. If you want them to have some crispness, let marinade a few minutes to an hour; longer if you want them more tender. Serve alongside bulgogi (Korean marinaded beef), perhaps wrapped up in lettuce leaves, or drain on paper towels and serve as a snack or appetizer. 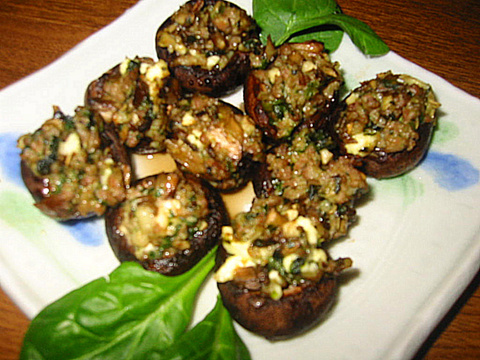 (Photograph by Laura Phillips and used with permission.)
Linda Phillips was inspired by my portabello stack recipe from 12/26 to come up with her own version, this one incorporating Four Mile River Farm's pork breakfast sausage, pre-seasoned with red pepper and sage. with wilted spinach leaves and feta cheese. Use portabellos if you want to make this a main dish, or crimini mushrooms ("baby bellas", the "junior" versions of portabello) to serve this as an appetizer. If you are a Fiddleheads customer and the FMRF pork breakfast sausage unavailable at the co-op, try their pork sweet italian sausage, which has subtle flavor notes of black pepper and fennel; or use their plain ground pork and add your own seasonings. Of course if you are far beyond the Fiddleheads universe, then use whatever pork sausage is available to you, preferably locally-sourced, hormone and steroid-free, preservative-free, and so forth. Whatever you use, give it a whiff before you cook it; fresh (or newly-thawed) meat should have little if any odor, or should smell mild and sweet. If it smells "like meat", it is starting to turn rancid. (The same applies to fish; ask to smell it at the fish counter and if it smells "fishy", don't buy it.) Laura Phillip's Stuffed Mushroom Caps with Pork Breakfast Sausage, Spinach and Feta Cheese small to medium-size portabello mushroom caps, OR large crimini (baby bellas), cleaned and de-stemmed pork breakfast sausage, crumbled (Laura used Four Mile River Farm's) fresh spinach leaves, finely chopped feta cheese Heat oven to 350 degrees F. Arrange prepared mushroom caps, gills-side up, on lightly oiled nonstick baking tray or dish. Cook sausage in skillet over medium heat until browned; remove from pan with slotted spoon onto plate or bowl lined with paper towels to drain. Reduce heat to low and stir spinach into the sausage drippings, stirring occasionally; cook 1-2 minutes or until wilted. Turn off heat, and add feta to pan. Mix spinach and feta with the pork sausage, then spoon evenly into prepared mushroom caps. Bake 12-18 minutes, or until mushrooms are tender but not mushy in the centers. |

/recipe-archive.htmlPrintable pdf files of the recipes on this blog can be found on our Recipe Archive Page.

Archives
August 2014
Categories
All

Text and photos copyright 2011-2013 Janice Janostak unless otherwise noted. All rights reserved.
|
 RSS Feed
